本文為英文版的機器翻譯版本,如內容有任何歧義或不一致之處,概以英文版為準。
# 教學課程:開始使用 Amazon OpenSearch Serverless 中的安全功能 (主控台)
此教學課程會帶您逐步了解使用 Amazon OpenSearch Serverless 主控台建立和管理安全性政策的基本步驟。
在本教學課程中,您將完成下列步驟:
1. [設定許可](#gsgpermissions)
1. [建立加密政策](#gsg-encryption)
1. [建立網路政策](#gsg-network)
1. [設定資料存取政策](#gsg-data-access)
1. [建立集合](#gsgcreate-collection)
1. [上傳並搜尋資料](#gsgindex-collection)
本教學課程會逐步引導您使用 設定集合 AWS 管理主控台。如需使用 的相同步驟 AWS CLI,請參閱 [教學課程:開始使用 Amazon OpenSearch Serverless (CLI) 中的安全功能](gsg-serverless-cli.md)。
## 步驟 1:設定許可
**注意**
如果您已經使用更廣泛的身分型政策,例如 `Action":"aoss:*"` 或 `Action":"*"`,則可以略過此步驟。不過,在生產環境中,我們建議您遵循最低權限原則,並且僅指派任務完成所需的最低許可。
為完成本教學課程,您必須具備正確的 IAM 許可。使用者或角色必須連接[身分型政策](security-iam-serverless.md#security-iam-serverless-id-based-policies),該政策包含以下最低許可:
------
#### [ JSON ]
****
```
{
"Version":"2012-10-17",
"Statement": [
{
"Action": [
"aoss:ListCollections",
"aoss:BatchGetCollection",
"aoss:CreateCollection",
"aoss:CreateSecurityPolicy",
"aoss:GetSecurityPolicy",
"aoss:ListSecurityPolicies",
"aoss:CreateAccessPolicy",
"aoss:GetAccessPolicy",
"aoss:ListAccessPolicies"
],
"Effect": "Allow",
"Resource": "*"
}
]
}
```
------
如需 OpenSearch Serverless 許可的完整清單,請參閱 [Amazon OpenSearch Serverless 的身分和存取管理](security-iam-serverless.md)。
## 步驟 2:建立加密政策
[加密政策](serverless-encryption.md)會指定 OpenSearch Serverless 用來加密集合的 AWS KMS 金鑰。您可以使用 AWS 受管金鑰 或不同的金鑰來加密集合。為確保本教學課程簡單易懂,我們將使用 AWS 受管金鑰加密集合。
**建立加密政策**
1. 開啟位於 https://[https://console.aws.amazon.com/aos/home](https://console.aws.amazon.com/aos/home ) 的 Amazon OpenSearch Service 主控台。
1. 在左側導覽窗格中,展開 **Serverless** (無伺服器),然後選擇 **Encryption policies** (加密政策)。
1. 選擇 **Create encryption policy** (建立加密政策)。
1. 將政策命名為 **books-policy**。如需相關描述,請輸入 **Encryption policy for books collection** (書籍集合的加密政策)。
1. 在 **Resources** (資源) 下,輸入 **books** (書籍),這就是您將為集合命名的名稱。如果您想要更廣泛的名稱,可以包含星號 (`books*`),以便將政策套用至以「書籍」一詞開頭的所有集合。
1. 對於**加密**,請保持選取**使用 AWS 擁有的金鑰**。
1. 選擇**建立**。
## 步驟 3:建立網路政策
[網路政策](serverless-network.md)會決定集合是否可透過網際網路從公用網路存取,或者是否必須透過 OpenSearch Serverless 受管 VPC 端點進行存取。在本教學課程中,我們將設定公用存取權。
**建立網路政策**
1. 在左側導覽窗格中,選擇 **Network policies** (網路政策),然後選擇 **Create network policy** (建立網路政策)。
1. 將政策命名為 **books-policy**。如需相關描述,請輸入 **Network policy for books collection** (書籍集合的網路政策)。
1. 在 **Rule 1** (規則 1) 下,將規則命名為 **Public access for books collection** (書籍集合的公用存取權)。
1. 為確保本教學課程簡單易懂,我們將為*書籍*集合設定公用存取權。對於存取類型,選取 **Public** (公用)。
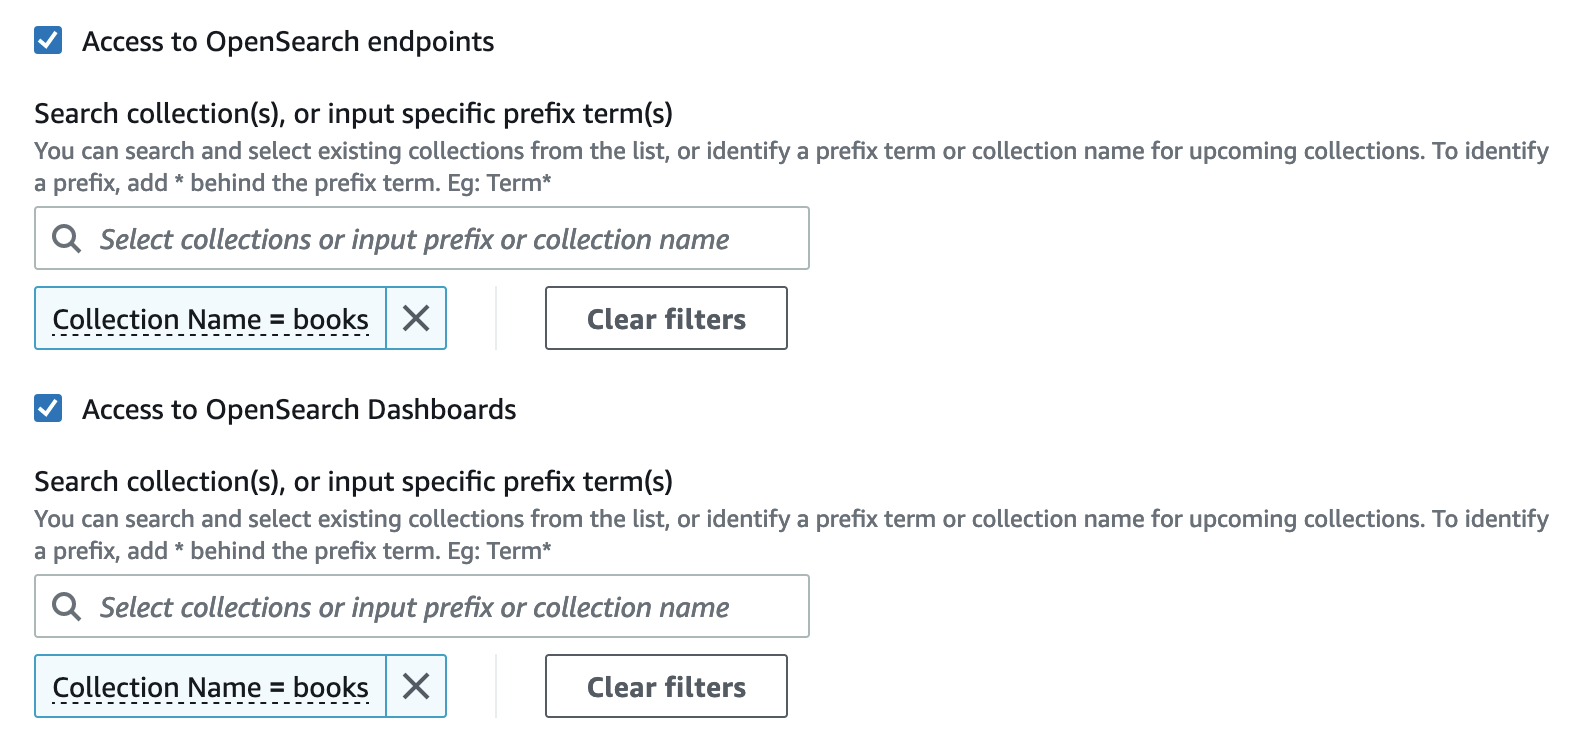
1. 我們要從 OpenSearch Dashboards 存取該集合。若要執行這項操作,您需要設定 Dashboards *以及* OpenSearch 端點的網路存取,否則 Dashboards 將無法運作。
對於資源類型,請同時啟用 **OpenSearch 端點的存取權**和 **OpenSearch Dashboards 的存取權**。
1. 在兩個輸入方塊中,輸入 **Collection Name = books** (集合名稱 = 書籍)。此設定會縮減政策的範圍,使該政策僅套用至單一集合 (`books`)。您的規則應如下所示:
1. 選擇**建立**。
## 步驟 4:建立資料存取政策
在您設定資料存取之前,將無法存取集合資料。[資料存取政策](serverless-data-access.md)與您在步驟 1 中設定的 IAM 身分型政策不同。資料存取政策允許使用者存取集合中的實際資料。
在本教學課程中,我們將為單一使用者提供將資料索引編製為*書籍*集合所需的許可。
**建立資料存取政策**
1. 在左側導覽窗格中,選擇 **Data access policies** (資料存取政策),然後選擇 **Create access policy** (建立存取政策)。
1. 將政策命名為 **books-policy**。如需相關描述,請輸入 **Data access policy for books collection** (書籍集合的資料存取政策)。
1. 選取 **JSON** 作為政策定義方法,並將下列政策貼到 JSON 編輯器中。
將主體 ARN 取代為您將用來登入 OpenSearch Dashboards 和為資料編製索引的帳戶 ARN。
```
[
{
"Rules":[
{
"ResourceType":"index",
"Resource":[
"index/books/*"
],
"Permission":[
"aoss:CreateIndex",
"aoss:DescribeIndex",
"aoss:ReadDocument",
"aoss:WriteDocument",
"aoss:UpdateIndex",
"aoss:DeleteIndex"
]
}
],
"Principal":[
"arn:aws:iam::{{123456789012}}:{{user}}/{{my-user}}"
]
}
]
```
此政策為單一使用者提供在*書籍*集合中建立索引、為某些資料編製索引以及進行搜尋所需的最低許可。
1. 選擇**建立**。
## 步驟 5:建立集合
現在您已設定加密和網路政策,您可以建立相符的集合,而且安全設定會自動套用至該集合。
**建立 OpenSearch Serverless 集合**
1. 在左側導覽窗格中選擇 **Collections** (集合),然後選擇 **Create collection** (建立集合)。
1. 將該集合命名為 **books** (書籍)。
1. 對於集合類型,選擇 **Search** (搜尋)。
1. 在 **Encryption** (加密) 下,OpenSearch Serverless 會告知您集合名稱與 `books-policy` 加密政策相符。
1. 在 **Network access settings** (網路存取設定) 下,OpenSearch Serverless 會告知您集合名稱與 `books-policy` 網路政策相符。
1. 選擇**下一步**。
1. 在 **Data access policy options** (資料存取政策選項) 下,OpenSearch Serverless 會通知您集合名稱符合 `books-policy` 資料存取政策。
1. 選擇**下一步**。
1. 檢閱集合組態,然後選擇 **Submit** (提交)。集合初始化所需的時間通常不到一分鐘。
## 步驟 6:上傳並搜尋資料
您可以使用 Postman 或 curl,將資料上傳至 OpenSearch Serverless 集合。為了簡潔起見,這些範例使用 OpenSearch Dashboards 主控台中的 **Dev Tools** (開發工具)。
**在集合中為資料編製索引和進行搜尋**
1. 在左側導覽窗格中選擇 **Collections** (集合),然後選擇 **books** (書籍) 集合以開啟其詳細資訊頁面。
1. 選擇集合的 OpenSearch Dashboards URL。URL 採用的格式為 `https://{{collection-id}}.us-east-1.aoss.amazonaws.com/_dashboards`。
1. 使用您在資料存取政策中指定之主體的 [AWS 存取金鑰和私密金鑰](https://docs.aws.amazon.com/powershell/latest/userguide/pstools-appendix-sign-up.html)登入 OpenSearch Dashboards。
1. 在 OpenSearch Dashboards 中,開啟左側導覽選單,然後選擇 **Dev Tools** (開發工具)。
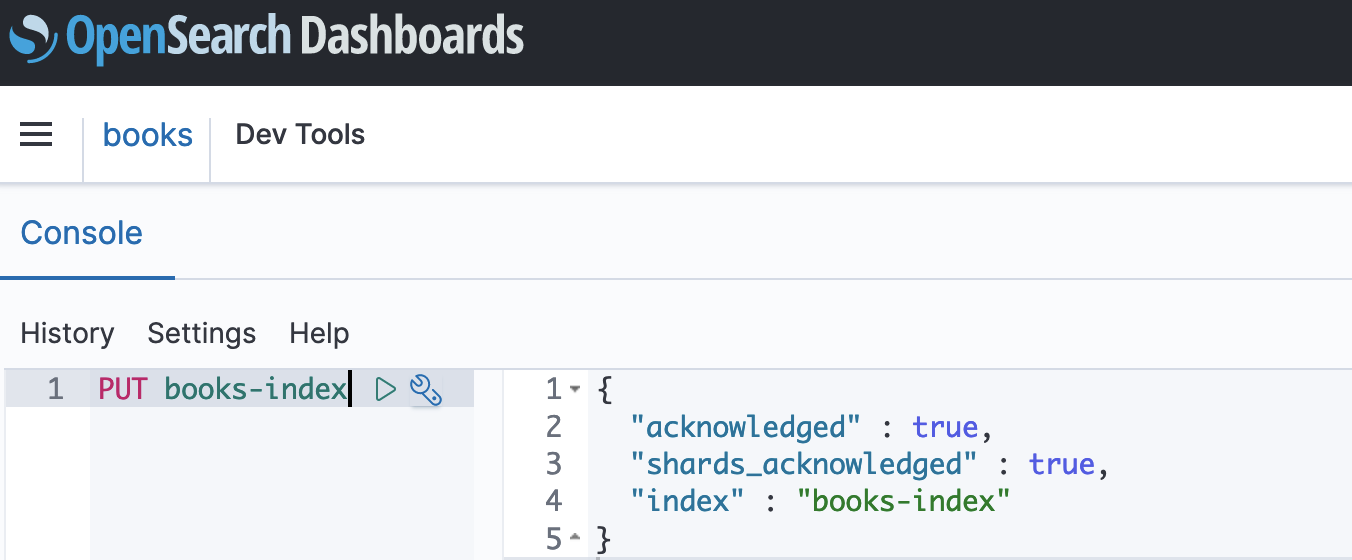
1. 若要建立名為 *books-index* 的單一索引,請執行下列命令:
```
PUT books-index{{ }}
```
1. 若要將單一文件的索引編製為 *books-index*,請執行下列命令:
```
PUT books-index/_doc/1
{
"title": "The Shining",
"author": "Stephen King",
"year": 1977
}
```
1. 若要在 OpenSearch Dashboards 中搜尋資料,您需要設定至少一個索引模式。OpenSearch 使用這些模式來識別您要分析的索引。開啟 Dashboards 主選單,選擇 **Stack Management** (堆疊管理),選擇 **Index Patterns** (索引模式),然後選擇 **Create index pattern** (建立索引模式)。在本教學課程中,輸入 *books-index*。
1. 選擇 **Next step** (下一步),然後選擇 **Create index pattern** (建立索引模式)。建立模式之後,您可以檢視各種文件欄位,例如 `author` 和 `title`。
1. 若要開始搜尋資料,請再次開啟主選單,然後選擇 **Discover** (探索),或使用[搜尋 API](https://opensearch.org/docs/latest/opensearch/rest-api/search/)。