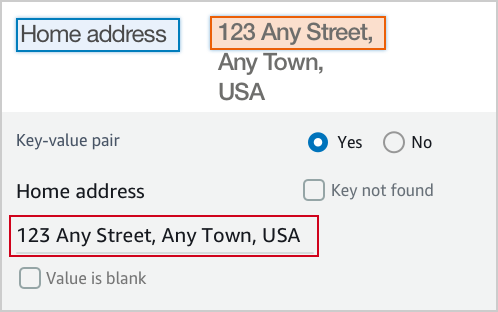
Click on a key-value block to highlight the corresponding key-value pair in the document.
If it is a valid key-value pair, review the content for the value. If the content is incorrect, correct it.
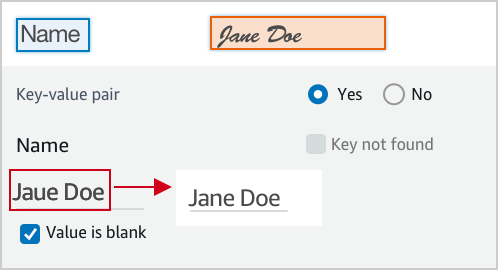
The text of the value is incorrect, correct it.
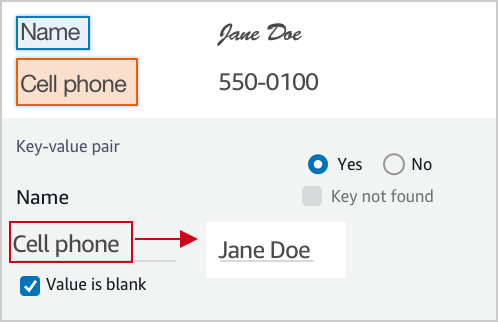
A wrong value is identified, correct it.
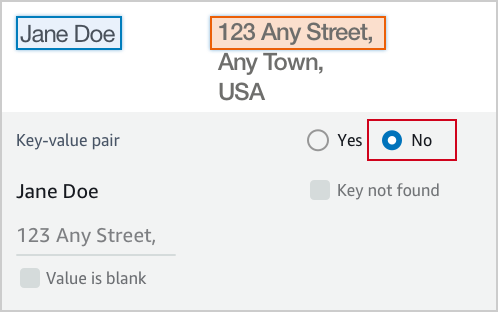
If it is not a valid key-value relationship, choose No.
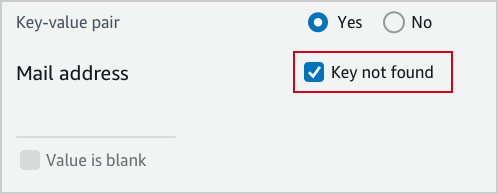
If you can’t find the key in the document, choose Key not found.
If the content of a field is empty, choose Value is blank.
![]()
Examples
Key and value are often displayed next or below to each other.
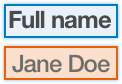
Key and value displayed in one line.

Key and value displayed in two lines.
If the content of the value has multiple lines, enter all the text without line break. Include all value text even if it extends beyond the highlight box.
Review the image and choose all applicable categories. If no categories apply, choose None. Nudity Visuals depicting nude male or female person or persons Partial Nudity Visuals depicting covered up nudity, for example using hands or pose Revealing Clothes Visuals depicting revealing clothes and poses Physical Violence Visuals depicting violent physical assault, such as kicking or punching Weapon Violence Visuals depicting violence using weapons like firearms or blades, such as shooting Weapons Visuals depicting weapons like firearms and blades
Positive sentiment include: joy, excitement, delight
Negative sentiment include: anger, sarcasm, anxiety
Neutral: neither positive or negative, such as stating a fact
Mixed: when the sentiment is mixed