Create an AgentCore gateway using the API
To create a AgentCore gateway using the API, make a CreateGateway request with one of the AgentCore control plane endpoints.
Minimally, you must specify the following fields:
The following optional fields add metadata to your gateway:
-
protocolType – The protocol type for the gateway. If you set this to MCP, the gateway operates in aggregation mode and can only have MCP targets. If you omit this field, the gateway can have both MCP and HTTP targets.
-
description – A description of the gateway.
-
tags – A dictionary of key-value pairs specifying tags that you can use to label your gateway for monitoring purposes.
The remaining fields depend on your gateway configuration and whether you want to toggle custom features for your gateway:
-
clientToken – A client token value to ensure that a request completes no more than once. If you don’t include this token, one is randomly generated for you. If you don’t include a value, one is randomly generated for you. For more information, see Ensuring idempotency.
-
authorizerConfiguration – If your authorizer type is CUSTOM_JWT , you must include this field to specify the gateway authorization and authentication parameters. For more information, see The authorizer configuration.
-
kmsKeyArn – To encrypt your gateway with a KMS key include the ARN of the key in this field. For more information, see Encrypt your AgentCore gateway with a customer-managed KMS key.
-
exceptionLevel – To turn on debugging messages when invoking the gateway, set this value to DEBUG . For more information, see Turn on debugging messages . For examples of creating a gateway with this setting, see Create a gateway with debugging messages.
-
interceptorConfigurations – To turn on custom code that is run when invoking your gateway, include this field. For more information, see Using interceptors with Gateway . For examples of creating a gateway with interceptors, see Create a gateway with interceptor configurations.
-
protocolConfiguration – To include customizations for the gateway protocol, configure the settings in this field. For options in this configuration, see GatewayProtocolConfiguration.
The authorizer configuration
If your authorizer type is CUSTOM_JWT , you must also include an authorizer configuration in the authorizerConfiguration field. The basic structure of the authorizer configuration is as follows:
{
  "customJWTAuthorizer": {
    "discoveryUrl": "string",
    "allowedAudience": ["string"],
    "allowedClients": ["string"],
    "allowedScopes": ["string"],
    "customClaims": see below
  }
}
You must provide the discovery URL for the authentication token. The remaining fields define restrictions for the authentication claims:
-
allowedAudience – The audiences or services that can handle the JWT.
-
allowedClients – The clients that are allowed to create a JWT.
-
allowedScopes – The scopes of that limit the set of claims.
-
customClaims – An array of objects that allows you to define custom fields and values that limit the claims to be authenticated. Each object is a CustomClaimValidationsType object contains the following fields:
-
inboundTokenClaimName – The name of the custom claim field to check.
-
inboundTokenClaimValueType – The data type of the claim value to check for.
-
authorizingClaimMatchValue – Defines the value to match the claim value to. Contains the following fields:
The following examples show the structure of the CustomClaimValidationsType objects that you can specify:
Example
- String matches string
-
-
{
  "inboundTokenClaimName": "string",
  "inboundTokenClaimValueType": "STRING",
  "authorizingClaimMatchValue": {
    "claimMatchValue": {
      "matchValueString": "string"
    },
    "claimMatchOperator": "EQUALS"
  }
}
- Array contains string
-
-
{
  "inboundTokenClaimName": "string",
  "inboundTokenClaimValueType": "STRING_ARRAY",
  "authorizingClaimMatchValue": {
    "claimMatchValue": {
      "matchValueString": "string"
    },
    "claimMatchOperator": "CONTAINS"
  }
}
- Array contains any value in array
-
-
{
  "inboundTokenClaimName": "string",
  "inboundTokenClaimValueType": "STRING_ARRAY",
  "authorizingClaimMatchValue": {
    "claimMatchValue": {
      "matchValueStringList": ["string"]
    },
    "claimMatchOperator": "CONTAINS_ANY"
  }
}
To see examples of how to create a gateway, expand the section that corresponds to your use case:
Create a gateway: basic example (Custom JWT authorization)
This section provides basic examples of creating a gateway.
Note the following: * The values for the authorization configuration are from when you set up inbound authorization . * If you choose an option that involves specifying an overt gateway service role ARN, ensure that you specify an existing one that you’ve set up. For more information, see AgentCore Gateway service role permissions.
Select one of the following methods:
Example
- AgentCore CLI
-
-
The AgentCore CLI provides a simple way to create a gateway in a command line interface.
To create the gateway, you use the agentcore add gateway command. The gateway service role and Amazon Cognito authorization are automatically configured for you during deployment.
Using default arguments
Run the following command in a terminal to create a gateway with no authorization (the default). To add Custom JWT authorization, specify the authorizer flags as shown in the next example:
agentcore add gateway --name my-gateway
Specifying arguments
The following command shows how to create a gateway with Custom JWT authorization and explicit configuration:
agentcore add gateway \
  --name my-gateway \
  --authorizer-type CUSTOM_JWT \
  --discovery-url "https://cognito-idp.us-west-2.amazonaws.com/some-user-pool/.well-known/openid-configuration" \
  --allowed-audience "api.example.com"
agentcore deploy
After deployment, the gatewayUrl shown by agentcore status is the endpoint to use when you invoke the gateway.
- Interactive
-
-
Run agentcore to open the TUI, then select add and choose Gateway :
-
Enter the gateway name:
-
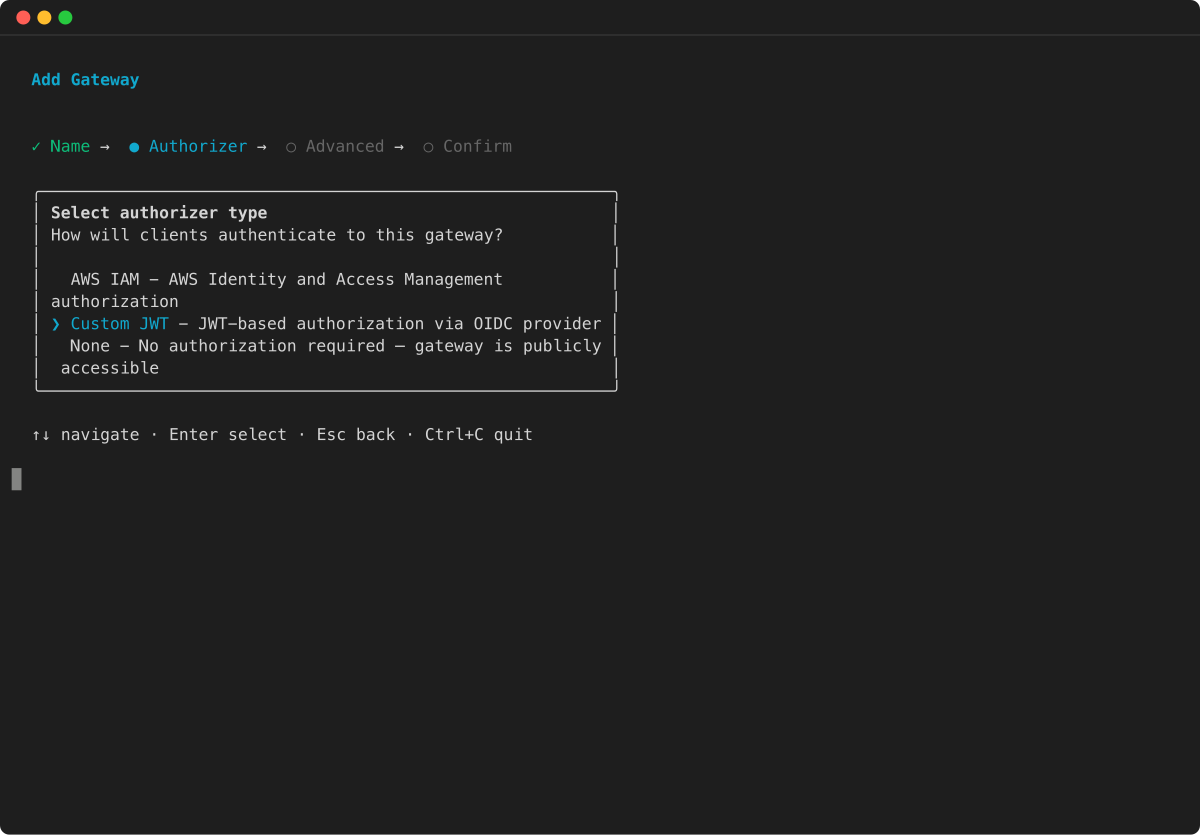
Select Custom JWT as the authorizer type and press Enter :
-
Configure advanced options:
-
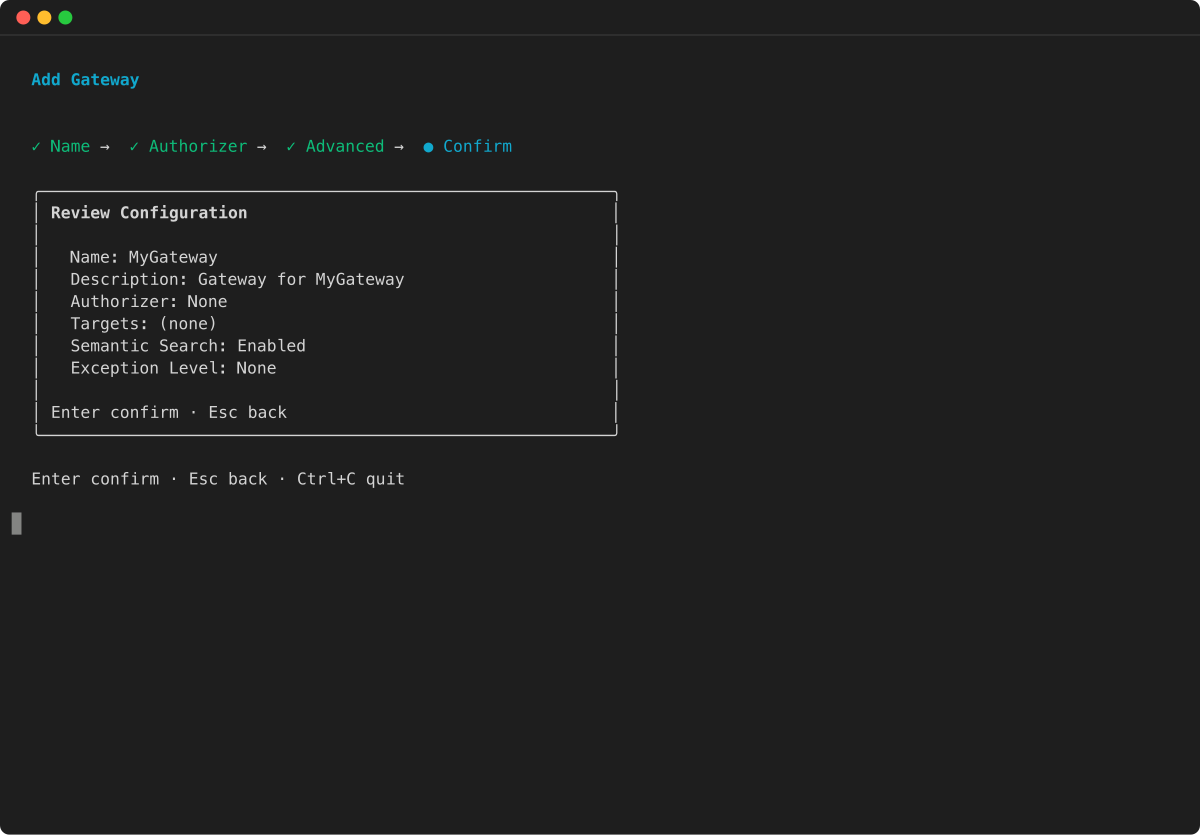
Review the configuration summary and press Enter to confirm:
-
AWS CLI
-
-
Run the following code in a terminal to create a basic gateway with the AWS CLI:
aws bedrock-agentcore-control create-gateway \
  --name my-gateway \
  --role-arn arn:aws:iam::123456789012:role/my-gateway-service-role \
  --protocol-type MCP \
  --authorizer-type CUSTOM_JWT \
  --authorizer-configuration '{
    "customJWTAuthorizer": {
      "discoveryUrl": "https://cognito-idp.us-west-2.amazonaws.com/some-user-pool/.well-known/openid-configuration",
      "allowedClients": ["clientId"]
    }
  }'
The gatewayUrl in the response is the endpoint to use when you invoke the gateway.
-
AWS Python SDK (Boto3)
-
-
The following Python code shows how to create a basic gateway with the AWS Python SDK (Boto3):
import boto3

# Initialize the AgentCore client
client = boto3.client('bedrock-agentcore-control')

# Create a gateway
gateway = client.create_gateway(
  name="my-gateway",
  roleArn="arn:aws:iam::123456789012:role/my-gateway-service-role",
  protocolType="MCP",
  authorizerType="CUSTOM_JWT",
  authorizerConfiguration={
      "customJWTAuthorizer": {
          "discoveryUrl": "https://cognito-idp.us-west-2.amazonaws.com/some-user-pool/.well-known/openid-configuration",
          "allowedClients": ["clientId"]
      }
  }
)

print(f"MCP Endpoint: {gateway['gatewayUrl']}")
Create a gateway: basic example (IAM authorization)
This section provides basic examples of creating a gateway using IAM authorization. With IAM authorization, you don’t need an authorizer configuration.
The AgentCore CLI does not support creating gateways with IAM authorization. Use the AWS Command Line Interface or AWS Python SDK (Boto3) to create a gateway with IAM authorization.
Select one of the following methods:
Example
-
AWS CLI
-
-
Run the following in a terminal:
aws bedrock-agentcore-control create-gateway \
--name my-gateway \
--role-arn arn:aws:iam::123456789012:role/MyAgentCoreServiceRole \
--protocol-type MCP \
--authorizer-type AWS_IAM
- Boto3
-
-
import boto3

# Create the AgentCore client
agentcore_client = boto3.client('bedrock-agentcore-control')

# Create a gateway
gateway = agentcore_client.create_gateway(
  name="my-gateway",
  roleArn="arn:aws:iam::123456789012:role/MyAgentCoreServiceRole",
  protocolType="MCP",
  authorizerType="AWS_IAM"
)
Create a gateway: basic example (NONE authorizer)
This section provides basic examples of creating a gateway with a NONE authorizer type. This represents a gateway that will not perform authentication or authorization for any incoming requests.
* The NONE authorizer type represents a gateway that will not perform authentication or authorization for any incoming requests. See inbound authorization for security concerns and details around using this configuration. * If you choose an option that involves specifying an overt gateway service role ARN, ensure that you specify an existing one that you’ve set up. For more information, see AgentCore Gateway service role permissions.
Select one of the following methods:
Example
- AgentCore CLI
-
-
The AgentCore CLI provides a simple way to create a gateway with NONE authorizer type in a command line interface.
The following command shows how to create a gateway with NONE authorizer type:
agentcore add gateway \
  --name my-gateway \
  --authorizer-type NONE
agentcore deploy
After deployment, the gatewayUrl shown by agentcore status is the endpoint to use when you invoke the gateway.
- Interactive
-
-
Run agentcore to open the TUI, then select add and choose Gateway :
-
Enter the gateway name:
-
Select NONE as the authorizer type and press Enter :
-
Configure advanced options:
-
Review the configuration summary and press Enter to confirm:
-
AWS CLI
-
-
Run the following code in a terminal to create a gateway with NONE authorizer type using the AWS CLI:
aws bedrock-agentcore-control create-gateway \
  --name my-gateway \
  --role-arn arn:aws:iam::111122223333:role/my-gateway-service-role \
  --protocol-type MCP \
  --authorizer-type NONE
The gatewayUrl in the response is the endpoint to use when you invoke the gateway.
-
AWS Python SDK (Boto3)
-
-
The following Python code shows how to create a gateway with NONE authorizer type using the AWS Python SDK (Boto3):
import boto3

# Initialize the AgentCore client
client = boto3.client('bedrock-agentcore-control')

# Create a gateway
gateway = client.create_gateway(
  name="my-gateway",
  roleArn="arn:aws:iam::111122223333:role/my-gateway-service-role",
  protocolType="MCP",
  authorizerType="NONE"
)

print(f"MCP Endpoint: {gateway['gatewayUrl']}")
Create a gateway: basic example (AUTHENTICATE_ONLY authorization)
This section provides examples of creating a gateway with AUTHENTICATE_ONLY authorization. With this authorizer type, the gateway validates the inbound token but does not perform full authorization. The authenticated identity or token is then passed through to the target for downstream authorization. This is useful when you want the gateway to verify that the caller is authenticated while delegating authorization decisions to the target service.
The AUTHENTICATE_ONLY authorizer type requires a JWT authorizer configuration. The gateway validates the token but does not enforce scope or audience restrictions for authorization. If you choose an option that involves specifying an overt gateway service role ARN, ensure that you specify an existing one that you’ve set up. For more information, see AgentCore Gateway service role permissions.
Select one of the following methods:
Example
-
AWS CLI
-
-
Run the following command to create a gateway with AUTHENTICATE_ONLY authorization:
aws bedrock-agentcore-control create-gateway \
  --name my-gateway \
  --role-arn arn:aws:iam::111122223333:role/my-gateway-service-role \
  --authorizer-type AUTHENTICATE_ONLY \
  --authorizer-configuration '{
    "jwtAuthenticationConfiguration": {
      "discoveryUrl": "https://cognito-idp.us-west-2.amazonaws.com/some-user-pool/.well-known/openid-configuration",
      "allowedClients": ["clientId"]
    }
  }'
The gatewayUrl in the response is the endpoint to use when you invoke the gateway.
-
AWS Python SDK (Boto3)
-
-
The following Python code shows how to create a gateway with AUTHENTICATE_ONLY authorization:
import boto3

# Initialize the AgentCore client
client = boto3.client('bedrock-agentcore-control')

# Create a gateway
gateway = client.create_gateway(
  name="my-gateway",
  roleArn="arn:aws:iam::111122223333:role/my-gateway-service-role",
  authorizerType="AUTHENTICATE_ONLY",
  authorizerConfiguration={
      "jwtAuthenticationConfiguration": {
          "discoveryUrl": "https://cognito-idp.us-west-2.amazonaws.com/some-user-pool/.well-known/openid-configuration",
          "allowedClients": ["clientId"]
      }
  }
)

print(f"Gateway URL: {gateway['gatewayUrl']}")
Create a gateway with semantic search
This section provides basic examples of creating a gateway with a tool to allow you to semantically search for relevant tools. To learn how to use this tool, see Search for tools in your AgentCore gateway with a natural language query.
Select one of the following methods:
Example
- AgentCore CLI
-
-
By default, semantic search is enabled when you create a gateway using the AgentCore CLI. To disable it, use the --no-semantic-search flag. To create a gateway with default semantic search enabled:
agentcore add gateway --name my-gateway
agentcore deploy
- Interactive
-
-
Run agentcore to open the TUI, then select add and choose Gateway . Semantic search is enabled by default in the advanced options:
-
Enter the gateway name:
-
Select the authorizer type and press Enter :
-
In advanced options, verify that semantic search is enabled (this is the default):
-
Review the configuration summary and press Enter to confirm:
-
AWS CLI
-
-
Turn on semantic search when creating a gateway in the AWS CLI by specifying searchType as SEMANTIC in the --protocol-configuration object, as in the following example:
aws bedrock-agentcore-control create-gateway \
  --name my-gateway \
  --role-arn arn:aws:iam::123456789012:role/my-gateway-service-role \
  --protocol-type MCP \
  --authorizer-type CUSTOM_JWT \
  --authorizer-configuration '{
    "customJWTAuthorizer": {
      "discoveryUrl": "https://cognito-idp.us-west-2.amazonaws.com/some-user-pool/.well-known/openid-configuration",
      "allowedClients": ["clientId"]
    }
  }' \
  --protocol-configuration '{
    "mcp": {
        "searchType": "SEMANTIC"
    }
  }'
The gatewayUrl in the response is the endpoint to use when you invoke the gateway.
-
AWS Python SDK (Boto3)
-
-
Turn on semantic search when creating a gateway using the AWS Python SDK (Boto3) by specifying searchType as SEMANTIC in the protocolConfiguration object, as in the following example:
import boto3

# Initialize the AgentCore client
client = boto3.client('bedrock-agentcore-control')

# Create a gateway
gateway = client.create_gateway(
  name="my-gateway",
  roleArn="arn:aws:iam::123456789012:role/my-gateway-service-role",
  protocolType="MCP",
  authorizerType="CUSTOM_JWT",
  authorizerConfiguration={
      "customJWTAuthorizer": {
          "discoveryUrl": "https://cognito-idp.us-west-2.amazonaws.com/some-user-pool/.well-known/openid-configuration",
          "allowedClients": ["clientId"]
      }
  },
  protocolConfiguration={
    "mcp": {
        "searchType": "SEMANTIC"
    }
  }
)

print(f"MCP Endpoint: {gateway['gatewayUrl']}")
Create a gateway with debugging messages
You can create a gateway with debugging messages by specifying the exceptionLevel value as DEBUG . This section provides examples of creating a gateway with debugging messages. To learn more, see Turn on debugging messages.
The AgentCore CLI does not set exceptionLevel to DEBUG by default. You must pass the --exception-level DEBUG flag when creating the gateway. You can turn off debugging messages by sending an UpdateGateway request and omitting the exceptionLevel argument.
Select one of the following methods:
Example
- AgentCore CLI
-
-
When you create a gateway using the AgentCore CLI, pass the --exception-level flag to enable debugging messages:
agentcore add gateway --name my-gateway --exception-level DEBUG
agentcore deploy
- Interactive
-
-
Run agentcore to open the TUI, then select add and choose Gateway . In advanced options, you can enable debugging messages by setting the exception level to DEBUG :
-
Enter the gateway name:
-
Select the authorizer type and press Enter :
-
In advanced options, set the exception level to DEBUG :
-
Review the configuration summary and press Enter to confirm:
-
AWS CLI
-
-
Run the following code in a terminal to create a gateway with debugging messages turned on in the AWS CLI:
aws bedrock-agentcore-control create-gateway \
  --name my-gateway \
  --role-arn arn:aws:iam::123456789012:role/my-gateway-service-role \
  --protocol-type MCP \
  --authorizer-type CUSTOM_JWT \
  --authorizer-configuration '{
    "customJWTAuthorizer": {
      "discoveryUrl": "https://cognito-idp.us-west-2.amazonaws.com/some-user-pool/.well-known/openid-configuration",
      "allowedClients": ["clientId"]
    }
  }' \
  --exception-level DEBUG
The gatewayUrl in the response is the endpoint to use when you invoke the gateway.
-
AWS Python SDK (Boto3)
-
-
The following Python code shows how to create a basic gateway with the AWS Python SDK (Boto3):
import boto3

# Initialize the AgentCore client
client = boto3.client('bedrock-agentcore-control')

# Create a gateway
gateway = client.create_gateway(
  name="my-gateway",
  roleArn="arn:aws:iam::123456789012:role/my-gateway-service-role",
  protocolType="MCP",
  authorizerType="CUSTOM_JWT",
  authorizerConfiguration={
      "customJWTAuthorizer": {
          "discoveryUrl": "https://cognito-idp.us-west-2.amazonaws.com/some-user-pool/.well-known/openid-configuration",
          "allowedClients": ["clientId"]
      }
  },
  exceptionLevel="DEBUG"
)

print(f"MCP Endpoint: {gateway['gatewayUrl']}")
Create a gateway with interceptor configurations
This section provides examples of creating a gateway that has interceptors configured. Interceptors will be invoked at runtime of the gateway for each request.
* Interceptors will be invoked at runtime of the gateway for each request. * If you choose an option that involves specifying an overt gateway service role ARN, ensure that you specify an existing one that you’ve set up. For more information, see AgentCore Gateway service role permissions.
Select one of the following methods:
Example
- AgentCore CLI
-
-
With the AgentCore CLI, first create the gateway and then configure interceptors using the AWS CLI or AWS Python SDK (Boto3).
Create the gateway:
agentcore add gateway \
  --name my-gateway \
  --authorizer-type CUSTOM_JWT \
  --discovery-url "https://cognito-idp.us-west-2.amazonaws.com/some-user-pool/.well-known/openid-configuration" \
  --allowed-audience "api.example.com"
agentcore deploy
After deployment, configure interceptors on the gateway using the AWS CLI update-gateway command or the AWS Python SDK (Boto3) as shown in the other tabs.
- Interactive
-
-
Run agentcore to open the TUI, then select add and choose Gateway . After creating the gateway, configure interceptors using the AWS CLI or AWS Python SDK (Boto3):
-
Enter the gateway name:
-
Select Custom JWT as the authorizer type and press Enter :
-
Configure advanced options:
-
Review the configuration summary and press Enter to confirm:
After the gateway is created and deployed, configure interceptors using the AWS CLI update-gateway command or the AWS Python SDK (Boto3) as shown in the other tabs.
-
AWS CLI
-
-
Run the following code in a terminal to create a gateway with interceptor configurations using the AWS CLI:
aws bedrock-agentcore-control create-gateway \
  --name my-gateway \
  --role-arn arn:aws:iam::123456789012:role/my-gateway-service-role \
  --protocol-type MCP \
  --authorizer-type CUSTOM_JWT \
  --authorizer-configuration '{
    "customJWTAuthorizer": {
      "discoveryUrl": "https://cognito-idp.us-west-2.amazonaws.com/some-user-pool/.well-known/openid-configuration",
      "allowedClients": ["clientId"]
    }
  }' \
  --interceptor-configurations '[{
      "interceptor": {
          "lambda": {
            "arn":"arn:aws:lambda:us-west-2:123456789012:function:my-interceptor-lambda"
          }
      },
      "interceptionPoints": ["REQUEST"]
  }]'
The gatewayUrl in the response is the endpoint to use when you invoke the gateway.
-
AWS Python SDK (Boto3)
-
-
The following Python code shows how to create a gateway with interceptor configurations using the AWS Python SDK (Boto3):
import boto3

# Initialize the AgentCore client
client = boto3.client('bedrock-agentcore-control')

# Create a gateway
gateway = client.create_gateway(
  name="my-gateway",
  roleArn="arn:aws:iam::123456789012:role/my-gateway-service-role",
  protocolType="MCP",
  authorizerType="CUSTOM_JWT",
  authorizerConfiguration={
      "customJWTAuthorizer": {
          "discoveryUrl": "https://cognito-idp.us-west-2.amazonaws.com/some-user-pool/.well-known/openid-configuration",
          "allowedClients": ["clientId"]
      }
  },
  interceptorConfigurations=[{
      "interceptor": {
          "lambda": {
            "arn":"arn:aws:lambda:us-west-2:123456789012:function:my-interceptor-lambda"
          }
      },
      "interceptionPoints": ["REQUEST"]
  }]
)

print(f"MCP Endpoint: {gateway['gatewayUrl']}")
Create a gateway with a policy engine configuration
You can create a gateway with a policy engine configuration. A policy engine is a collection of policies that evaluates and authorizes agent tool calls. When associated with a gateway, the policy engine intercepts all agent requests and determines whether to allow or deny each action based on the defined policies. The enforcement mode specifies whether to test policies ( LOG_ONLY ) or enforce them ( ENFORCE ).
Example
- AgentCore CLI
-
-
First, add a policy engine to your project. Then, create a gateway that references the policy engine:
agentcore add policy-engine \
  --name MyPolicyEngine

agentcore add gateway \
  --name MyGateway \
  --authorizer-type CUSTOM_JWT \
  --discovery-url https://cognito-idp.us-west-2.amazonaws.com/pool-id/.well-known/openid-configuration \
  --allowed-clients clientId \
  --policy-engine MyPolicyEngine \
  --policy-engine-mode LOG_ONLY

agentcore deploy
To enforce policies instead of only logging decisions, change --policy-engine-mode to ENFORCE.
-
AWS CLI
-
-
Run the following command to create a gateway with a policy engine configuration using the AWS CLI:
aws bedrock-agentcore-control create-gateway \
  --name my-gateway \
  --role-arn arn:aws:iam::123456789012:role/my-gateway-service-role \
  --protocol-type MCP \
  --authorizer-type CUSTOM_JWT \
  --authorizer-configuration '{
    "customJWTAuthorizer": {
      "discoveryUrl": "https://cognito-idp.us-west-2.amazonaws.com/pool-id/.well-known/openid-configuration",
      "allowedClients": ["clientId"]
    }
  }' \
  --policy-engine-configuration '{
    "arn": "arn:aws:bedrock-agentcore:us-west-2:123456789012:policy-engine/policy-id",
    "mode": "LOG_ONLY"
  }' \
  --exception-level DEBUG
The gatewayUrl in the response is the endpoint to use when you invoke the gateway.